|
|
Office of Special Education |
|
Getting Started — IHRS BasicsUsing the CAL Link, List Box and List of Values Functions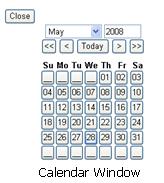
CalendarType all dates using the eight-digit format MM/DD/YYYY or select the date from the Calendar pop-up window. The Calendar opens with todays date as the default.
To select a date
List Box
A list box is a standard Windows convention for selecting pre-determined values. A default value is automatically inserted into a list box field. For example, the default value for Case Type is CSE. You will need to change the value to CPSE for a Committee on Pre-School Special Education case. To select a list box value:
List of Values (List)
List of Values (List) is similar to the List Box in that it provides you with a list of pre-defined values from which to choose. 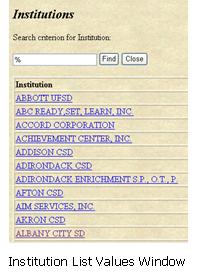
To select a value from a list:
When a List is very long, you can search for a value instead of scrolling through the list. If you are not sure of the spelling, you can use the % wild card. The wild card represents any value. For example, in the Institution List Values Window:
Finding, Entering and Saving Data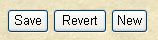
To enter a new record (e.g., opening a new case) or enter new data to a sub-record (e.g., IHO Appointment, Hearings, Extensions, etc.) click on the New button where applicable. New or changed information on a data entry window is not permanent until you click the Save button. You may modify some fields in a case record that has previously entered and saved information. Should you need to change the information you have entered back to the information that was previously saved click Revert. The Revert button is only available in records where information was previously entered and saved and data fields are modifiable. The Revert button will not undo saved information. See Data Change Requests for further information on modifiable fields and changing saved data. 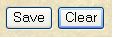
To clear data you have entered in blank data fields (e.g., fields in a new case record) or data you have entered in search fields on a query screen (e.g., searching for a case record in Case Maintenance) click on Clear. The Clear button is only available on new case records where information has not been saved yet and on query screens. Once the information is entered and saved, it is now a record and may be modifiable, in which case, you will then see the Revert button rather than the Clear button. The Clear button will not undo any data once entered and saved. See Data Change Requests for further information on modifiable fields and changing saved data. 
To find a record you have previously entered (e.g., searching for a case record in Case Maintenance or Case Query Detail) enter your search criteria and click the Find button. See Getting Started: Using Basic Data Analysis for more information on searching for records in IHRS. Success and Error MessagesSuccess! (in green) will appear at the top of the screen to acknowledge that the new information you entered was saved. Error! (in red) will appear at the top of the screen indicating that the new information was NOT saved. This may be because required information is missing or the information entered is invalid. You must correct the missing or invalid information before you can save. Note: If you do not receive either a Success message or a resulting error message click Refresh on your browsers tool bar to confirm your data was entered. Pop-Up MessagesA pop-up message in a separate window may appear indicating an error has occurred with instructions on how to correct the error. If you receive a pop-up error message box, click OK to close the box and make the correction as instructed. Request a Data ChangeMany data entry fields in IHRS cannot be changed once they are saved by the user, therefore, accurate data entry is important. However, if an error is entered and cannot be modified by the user a data change request form is available in the IHRS application. Please see Request a Data Change for assistance with submitting a data change form from the IHRS application. For more information regarding fields that may be modified by the user please see Modifiable Fields in Getting Started: IHRS Basics. Screen NavigationNavigate through IHRS using the main toolbars at the top and bottom of all the windows. Try to avoid using the Forward and Back buttons on your browser bar as this may cause you to lose any unsaved data that you have previously entered.
|
